Miscellaneous
1. Bezier Path
Use this component to create route paths that other components, or the camera will follow when a PLC input/output will be activated, or via script code.
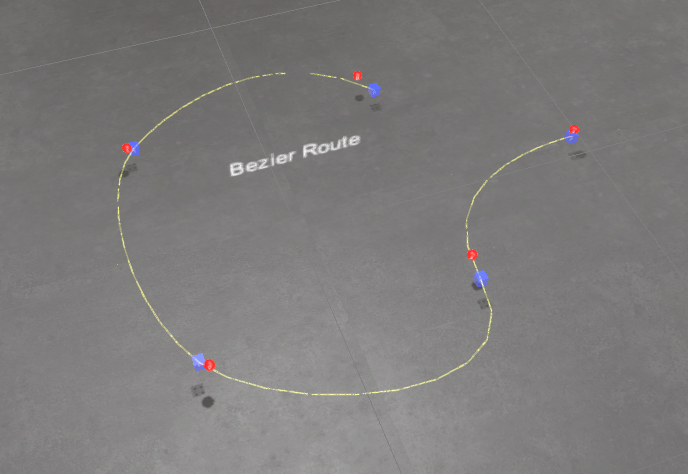
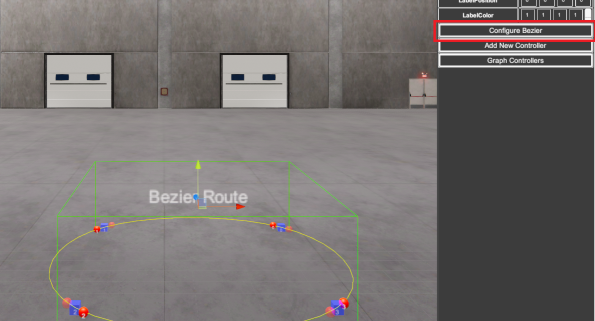
To configure the Bezier Path, press the Configure Bezier button in the right property panel once the component is selected:
Configure Bezier Window:
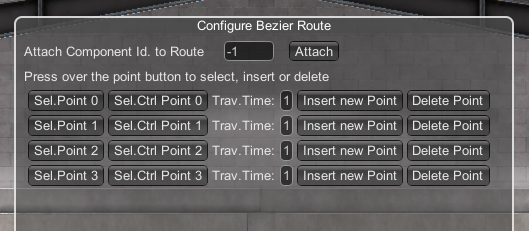
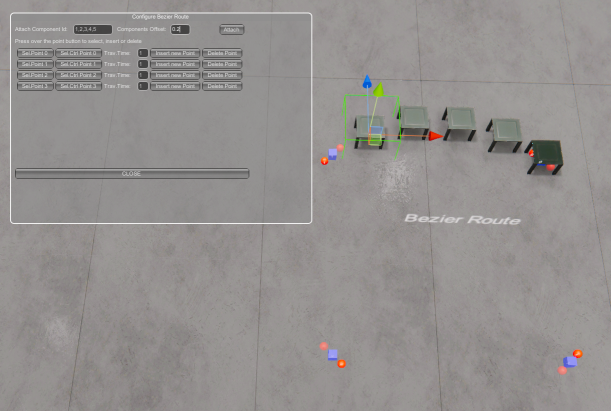
- Attach Component id to Route: set the component id number you want to follow the route and press the Attach button. Then when the route will be active (activating the selected I/O or via script code) the component will follow the route path. Also, you can select a list of components that will be linked to the Bezier route, to do it, type the components id separated by commas. Example:
5,6,7,8,9. - Component Offset: Use the Component Offset value to configure the offset between all the components that will follow the Bezier route:
- Sel.Point: when pressed selects the point, this way is easier to place it in the desired position.
- Sel.Ctrl.Point: when pressed selects the control point, this way is easier to move it to give the desired path shape.
- Trav.Time: sets the travel time between this point and the next.
- Insert new Point: inserts a new point between this point and the next.
- Delete Point: deletes the point.
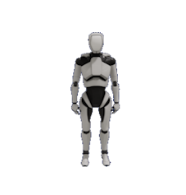
2. Character & Humanoid
Using this component is possible to use a humanoid robot or human person to configure complex animations and movements. Animations will be configured using the KeyFrame Animator tool included in the component. Once the KeyFrame is shown, you can create the animations using two modes: IK Mode or Bones Mode:
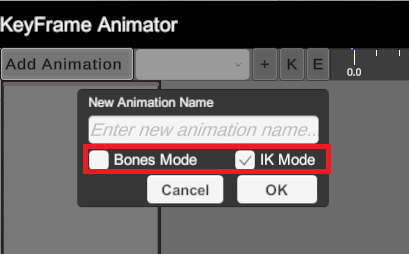
Using the IK Mode will allow to create fast animations moving all the chain bones of the human/humanoid component. The Bones mode allows for much more complex and complete animations by moving each of the bones that make up the component's skeleton.

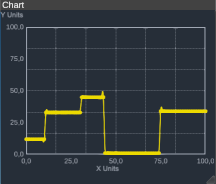
3. Chart
Through the Chart component, you can create Cartesian graphs to display values on the X, Y axes, both for fixed values and for continuous values with the management of a FIFO stack.
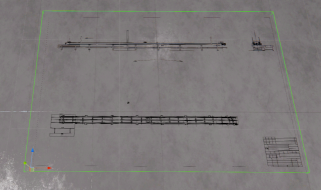
4. DXF Importer
Using the DXF Importer you can import DXF AutoCAD® files in your Machines Simulator Projects. The DXF files to be imported must follow some rules, not all the content inside a DXF file can be processed, only are imported the following DXF entities: lines, polylines, arcs, circles, and ellipses. Only are imported one annidation (insert) level. Is recommended if you want to import your DXF file in Machines Simulator, to simplify it with your AutoCAD® design software, converting all to basic entities and making only one insert level.
The following properties are available:
- ImportFactor: multiply factor when importing the DXF File, normally the DXF Scale is much higher than the used by Machines Simulator, reducing this value will adjust the dxf scale.
- LineWidth: sets the DXF lines width.
- ViewOnSimulation: if selected the DXF drawing will be shown during the simulation.
- Scale XZ: sets the global DXF scale.
The dfx files must be placed at the \Machines Simulator 4\ms4bin_Data\StreamingAssets\MyDXF\ folder

5. Operators
Three available persons, with animations that can interact in your machines. The operators moves and walks. Use the Bezier path to follow a route and use the walking animation.


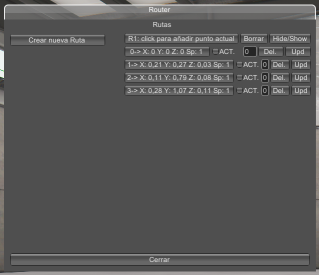
6. Router
This component can be used to perform movements following pre-configured routes. The routes will be composed of different spatial coordinates whose speed, delay time once they reach the destination and the possibility of activating a digital input of the PLC in each position can be modified.
Properties: * PLC_IN_ACTION: PLC input to be activated/deactivated in each point of the route.
- LinkedComponent: component name to be move in the route.
- LinkedComponentOffset: offset to apply to the component in the movement. Useful to avoid interferences when configuring the routes.
- TestMode: set this property on in the Editor, then pass to RUN mode, then the Router configuration windows will be visible to configure each path of the routes.

7. Vehicle
This component can be used for tests when vehicles are needed, for example, garage doors, crossroads, traffic lights, and so on… There are available four types of vehicles, use the numeric keypad keys to move it: 8 Key Pad key to move forward, 2 Key Pad key to move back, 6 Key Pad key to turn right, 4 Keypad key to turn left, Space Key to Brake. For the forklift use Page Up to move fork upper and Page Down to move fork down.

8. Video Player
This component allows to play video files. Useful to show videos for tutorials, instructions or decorative proposes. Supported video files: asf, avi, dv, m4v, mov, mp4, mpg, mpeg, ogv, vp8, webm, wmv. In order the videos could be played, place the video files in the \Machines Simulator 4\ms4bin_Data\StreamingAssets\Videos folder.

If the WebCam property is set to true, in the case the computer will have connected a webcam, the VideoPlayer will show the video from the webcam source.
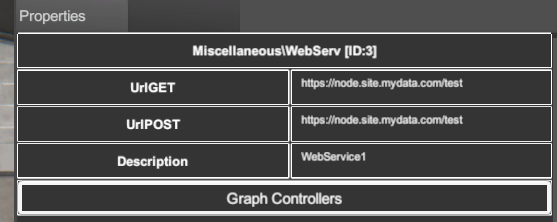
9. WebService
This component allows you to send and receive data to/from a server using the Get/Post functions, receiving/sending data in JSON format.

Example of use:
Let's consider that we have the address of the JSON file on the server we want to access (both writing and reading):
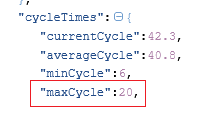
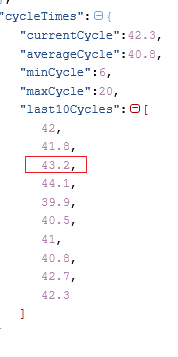
And the JSON file has the following structure:

Here are some examples of script code for reading and writing to certain keys:
public void Init()
{
//Reads the JSON content form Server
WebService1.ReadJSON();
}
public void Main()
{
// READ OPERATIONS
if(WebService3.Read)
{
if(!flag)
{
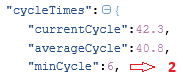
string t1 = WebService1.GetData("cycleTimes,maxCycle");
string t2 = WebService1.GetData("cycleTimes,last10Cycles,2");
string t3 = WebService1.GetData("components,2,status");
}
}
//WRITE OPERATIONS
if(Input.GetKeyDown(KeyCode.P))
{
WebService1.SetData("cycleTimes,minCycle", "2");
WebService1.SetData("components,1,componentId", "RND-002");
WebService1.WriteJSON();
}
}
- String t1 contains the value:
20
- String t2 contains the value
43.2
- String t3 contains the key:
error:
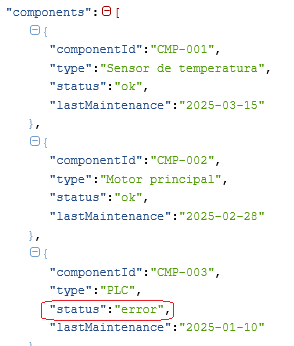
As can be seen in the examples, when passing the keys to be read, you can indicate the names of the keys, as well as the index of the enumerations to obtain the desired value.
In the second part of the example, see how the write operations are made, when ‘P’ key is presses is changed in the Server the JSON file with the current values:
WebService1.SetData("cycleTimes,minCycle", "2");
WebService1.SetData("components,1,componentId", "RND-002");
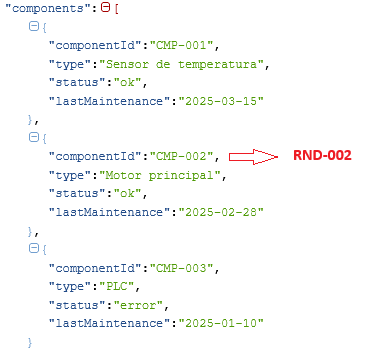
Keys must be separated by commas (depending on the nesting required) and without spaces.